How to Measure Yourself for Clothes When Shopping Online
Online clothing sizes can feel surprisingly inconsistent. A medium may fit perfectly from one brand and feel completely different from another, while two pairs of trousers carrying the same numeric size may have different waists, rises, and inseams. The most reliable starting point is not the label—it is a current set of body measurements, the product-specific size chart, and, when available, the finished garment measurements.
You do not need professional equipment or tailoring experience. A flexible tape measure, a mirror, and ten quiet minutes are enough. The steps below show you what to measure, how to avoid common mistakes, and how to use the numbers when a brand’s chart does not point neatly to one size.
Key Takeaways
- Use a soft tailor’s tape over fitted underwear or thin, close-fitting clothes, and keep the tape level, flat, and comfortably snug.
- Record your bust, natural waist, low waist, hips, shoulder width, sleeve length, inseam, thigh, and the lengths you prefer in tops, jackets, dresses, and trousers.
- Measure one or two garments that already fit well. Those finished-garment measurements can be more useful than a familiar size label.
- Use the size chart attached to the specific product whenever possible. Sizing can vary between brands and between styles sold by the same brand.
- When your measurements indicate different sizes, consider the garment’s cut, stretch, intended ease, and return policy instead of automatically sizing up or down.
What You Need Before Measuring
Use a soft, flexible tailor’s tape rather than a rigid ruler or metal construction tape. Keep a mirror nearby so you can check that the tape stays horizontal around your body. A notes app or a simple measurement card is useful for recording the results.
Measure over fitted underwear or a thin base layer. For your bust, wear the type of well-fitting everyday bra you would normally wear beneath the garment you are buying. Stand naturally with your feet together, breathe normally, and avoid pulling in your stomach or holding your shoulders unusually straight.
The tape should touch your body without compressing it. Measure each area twice. If the two readings differ, reset the tape and try again rather than averaging a loose measurement with a tight one. A helper makes shoulder, sleeve, and inseam measurements easier, but a mirror and a well-fitting garment provide good alternatives when you are working alone.
Body Measurements and Garment Measurements Are Not the Same
A body-measurement chart tells you which size is designed for a particular bust, waist, or hip range. A finished-garment chart tells you the actual dimensions of the clothing. Check the heading carefully before comparing your numbers.
Finished garments often include extra room, called ease, so you can sit, reach, and move. However, a stretchy or close-fitting garment may use very little ease or even measure smaller than the body area it is designed to fit. That is why you should not subtract a fixed number from every product measurement or assume that a larger garment measurement always indicates a loose fit.
Product descriptions can help clarify the difference. Look for terms such as fitted, slim, relaxed, oversized, structured, stretch, and non-stretch. These descriptions are not perfectly standardized, but they provide useful context when combined with measurements and fabric content.
How to Measure Your Bust, Waist, and Hips
Bust: Wrap the tape under your arms and around the fullest part of your bust. Keep it level across your back and shoulder blades. The tape should lie flat without pressing into your bra or skin.
Natural waist: Measure around the point where your torso naturally creases when you bend gently to one side. This is often the narrowest part of the torso or near the belly button, but bodies vary. Keep the tape comfortably loose enough to breathe normally.
Low waist or waistband position: Trousers and skirts do not always sit at the natural waist. Measure around the place where you want the waistband to rest, particularly when shopping for mid-rise or low-rise styles.
Hips and seat: Stand with your feet together and wrap the tape around the fullest part of your hips and seat. Use the mirror to make sure the tape is parallel to the floor and has not slipped upward at the back.
Do not rely on a rule such as measuring the hips a fixed number of inches below the waist. The fullest point sits higher or lower on different bodies, so locate it visually and check the tape from the side and back.
How to Measure Shoulders, Sleeves, and Upper-Body Length
Shoulder width: For body measurement, ask a helper to measure across your upper back from one shoulder point to the other. Because shoulder points can be difficult to locate alone, it is often easier to button or zip a well-fitting, non-stretch jacket and measure straight across its back from shoulder seam to shoulder seam.
Sleeve length: First check how the brand defines this measurement. Some brands measure from the shoulder point to the wrist; others measure from the center back of the neck, across the shoulder, and down the arm. Keep your elbow slightly bent and follow the brand’s method so you are comparing like with like. Lee’s official guide, for example, uses the center-back method for sleeve length.
Upper-body and jacket length: Start at the high point of your shoulder, close to the base of your neck, and measure down the front to the place where you want the hem to finish. For jackets and tops, measuring a garment you already like is usually more accurate: lay it flat and measure from the same shoulder point to the hem.
Shoulder fit deserves attention in structured jackets because it influences how the sleeves and upper body hang. If you are comparing different jacket proportions, our guide to wearing a leather jacket after 50 offers practical outfit examples without treating one length as universally flattering.
How to Measure for Trousers, Jeans, and Skirts
Inseam: With help, measure from the crotch down the inside of your leg to the ankle or desired hem. When measuring alone, lay a pair of trousers that fits well on a flat surface and measure from the crotch seam to the hem along the inside leg. This garment method is also recommended by several retailer size guides.
Thigh: Measure around the fullest part of your upper thigh, usually just below the crotch. This is especially useful for rigid denim, slim trousers, and fitted skirts when the product page supplies a corresponding garment measurement.
Rise: Product pages normally list rise as a garment measurement. On trousers that fit well, measure the front rise from the crotch seam to the top of the front waistband. Measure the back rise separately if it is provided. Rise affects where the waistband sits, so compare it with a pair you already find comfortable rather than assuming that every “high rise” reaches the same point.
Outseam or total length: Measure from the top of the waistband to the hem along the outside leg. This helps when a product page lists total trouser length rather than inseam.
Skirt length: Hold the tape at the waistband position where you intend to wear the skirt and measure down to your preferred hem. Personal preference, footwear, and the skirt’s silhouette matter more here than a universal rule. The same principle applies when choosing the length and break of wide-leg jeans after 50.
Measure Clothes You Already Know Fit Well
Your body measurements tell only part of the story. Measuring a favorite jacket, blouse, dress, or pair of trousers reveals how much ease, length, and room you personally enjoy.
Fasten the garment as you normally wear it, smooth it on a flat surface without stretching it, and record the measurements used on the retailer’s product page. Common flat-garment measurements include:
- Underarm-to-underarm width across the chest
- Shoulder seam to shoulder seam
- Sleeve length using the retailer’s stated method
- Waistband width, doubled for circumference when appropriate
- Front and back rise
- Inseam, outseam, and overall garment length
Check whether the retailer lists a measurement as a full circumference or as a flat width before comparing it. A flat 20-inch chest width usually represents approximately 40 inches around the garment, but garment shape, seam placement, and measuring method can affect the result.
How to Read a Product Size Chart
Start with the chart linked from the individual product page, not a generic international conversion chart or the size you usually buy elsewhere. Confirm whether the figures describe body measurements or finished garment dimensions.
Next, identify the measurements that control the fit of that particular garment:
- Blouses and jackets: prioritize bust and shoulders, then check sleeve and body length.
- Trousers and skirts: prioritize the intended waistband position and hips, then check rise, thigh, and length.
- Fitted dresses: compare bust, waist, and hips; a looser or A-line style may be more forgiving in one of those areas.
- Stretch knits: check fabric composition, intended fit, and product notes rather than judging by the unstretched measurement alone.
International size conversions are only a starting point. A U.S. size associated with a U.K. or European size does not guarantee identical garment dimensions. Return to the brand’s measurements whenever they are available.
What to Do When Your Measurements Fall Between Sizes
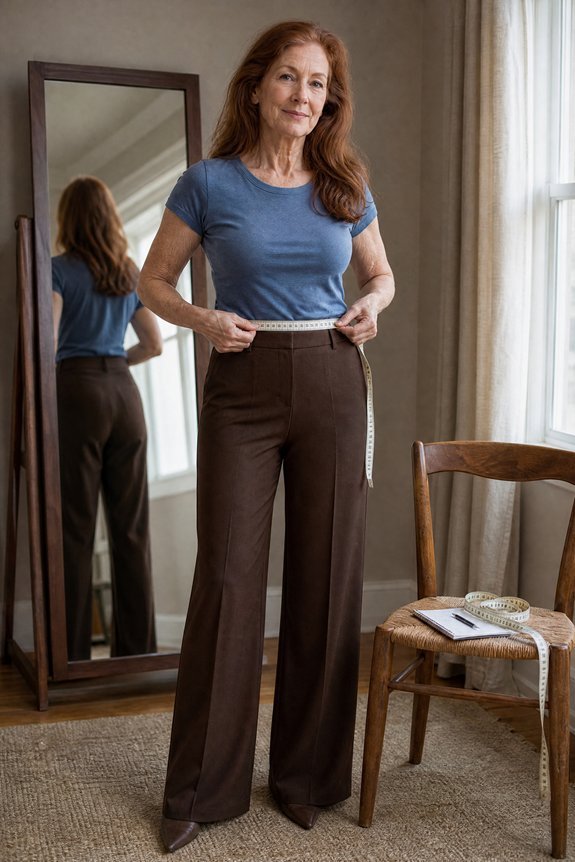
Different measurements often point to different sizes, and that does not mean you measured incorrectly. Ready-to-wear patterns are built around a brand’s fit model and intended proportions; your bust, waist, hips, shoulders, torso, and thighs do not have to match one row perfectly.
For a structured, non-stretch garment, begin with the size that accommodates the area the garment cannot comfortably compress. For example, hip room may control the fit of rigid trousers, while bust and shoulder room may control a fitted blazer. For a stretchy knit or deliberately oversized style, the smaller or larger option may both work but create different silhouettes.
Before ordering, check:
- The percentage of elastane or other stretch fiber
- Whether the garment is described as fitted, relaxed, or oversized
- Product-specific fit notes and the model’s listed size and measurements
- Reviews from shoppers who provide their measurements and describe where the garment felt tight or loose
- Whether petite, tall, curvy, or plus-size versions use different proportions rather than simply shorter, longer, or wider dimensions
- The return or exchange policy, especially for final-sale items
Do not assume that sizing up always solves the problem. It may add needed room in one area while making the shoulders, neckline, rise, or overall length less suitable. Use the garment’s construction and your fit priorities to decide.
Keep a Simple Measurement Record
Save your measurements in your phone with the date they were taken. Include notes such as “preferred ankle-length inseam,” “comfortable jacket shoulder width,” or “favorite relaxed-blouse chest measurement.” Those preferences can be more valuable than knowing that you usually wear a particular letter or number.
Retake your measurements after a noticeable body change, or whenever clothes begin fitting differently. Also remeasure before an expensive or final-sale purchase if your saved numbers are old. The goal is not to monitor your body—it is simply to compare current information with the garment you are considering.
Conclusion
Accurate measurements cannot guarantee that every online purchase will fit, because fabric, pattern shape, ease, and personal preference all matter. They can, however, replace guesswork with useful comparisons.
Measure your body carefully, keep the tape level, and record the dimensions of garments you already enjoy wearing. Then compare those numbers with the product-specific chart, fabric details, and fit notes. That combination is far more reliable than ordering by the size label alone—and it gives you a clearer reason for choosing one size over another.